New Baby Crochet Spring Dress
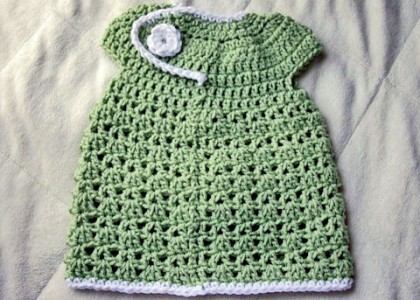
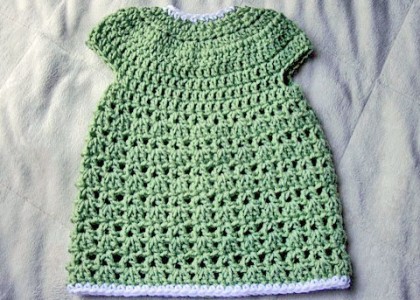
With so many baby girls being born to my friends in the upcoming months, I wanted to come up with a gift for all of their mothers to welcome their new additions. A pattern to celebrate baby girls. I designed this little going-home dress with spring in mind. Warm days that fade into chillier nights. It is lightweight, and airy, it would be perfect layered over a onesie and some leggings.
The pattern as written and using the yarn described will fit anywhere between 0-3 months depending on the baby’s size.
Yarn: Medium (4) (used for tutorial: Red Heart Super Saver)
Hook: I
Key:
SS: Slip Stitch
HDC: Half Double Crochet
DC: Double Crochet
SK: Skip
CH: Chain
SC: Single Crochet
V Stitch: DC, CH1, DC in the same stitch
Shell: 3 DC in the same stitch
Pattern:
Note: Each new row indicated by – before the first word of the sentence)
-CH 35
-HDC in the 2nd CH from the hook, and HDC in every CH till the end of the row, CH 2, turn
-HDC first HDC, then place 2 HDC in the next HDC, HDC in the next HDC, then place 2 HDC in the next HDC, continue alternating etc till the end of the row, CH 2, turn
-Repeat the previous row again, but this time CH 3 at the end of the second row, turn
-DC every HDC for the entire row, CH 3, turn
-DC every DC for the entire row
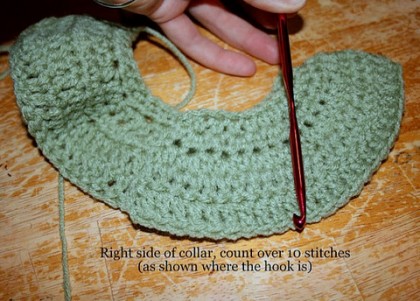
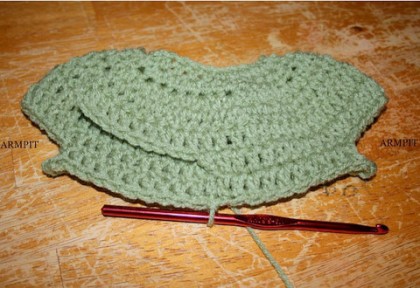
-SK 10 DC of the right side of the collar (as shown)
-SS in that 10th SK stitch
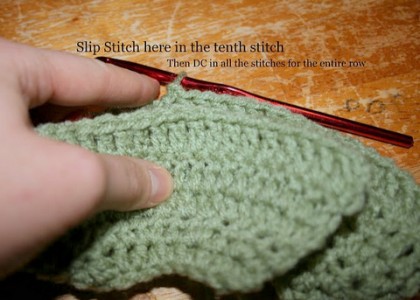
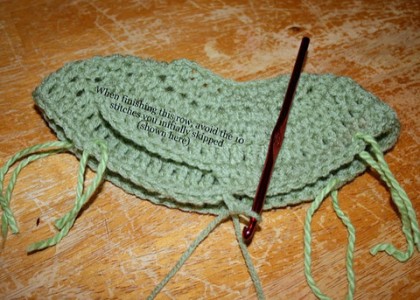
-DC in every DC across the entire row, avoiding the 10 DC you skipped at the beginning of the row. These stitches will remain free, and you will DC behind them. SS to the beginning DC, and CH 3
-Place a yarn piece or a stitch marker at the following stitches:
Count 10 stitches and place a marker, count another 13 stitches and place a marker, count 20 stitches and place a marker, count 13 stitches and place a marker (as shown.)
-DC in the first 10 DC till the first marker, CH 3, DC in the next marked stitch, DC in the next 20 DC till the next marker, CH 3, DC in the next marked stitch, DC in the last DC till the end of the row, SS to the top of the CH 3 at the beginning of the row, CH 3.
Now you can see where the armpits are formed (where you skipped stitches, and CH 3.)
-DC every DC, and in each of the CH of the armpits. SS to the top of the CH 3, Ch 3
NOTE: From now on for each and every beginning of the row be sure to DC in the stitch you SS into (next to where you CH 3)
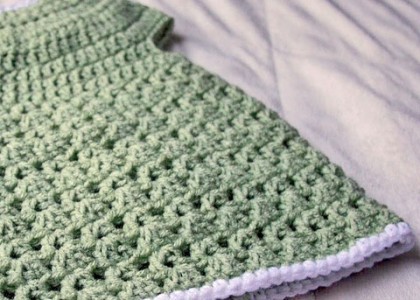
-(DC, CH1, DC) or V-stitch, in the stitch next to where you did the DC mentioned above, SK 1 DC, (DC, CH1,DC) or V-stitch, in the next DC, SK 1 DC, etc. Continue this pattern for the entire row, SS to the top of the CH 3 of the beginning stitch, SS, CH 3
-Place 3 DC (Shell) in the CH 1 space of the V-stitch below. Continue for the entire row, SS to the top of the CH 3 of the beginning stitch, SS, CH 3
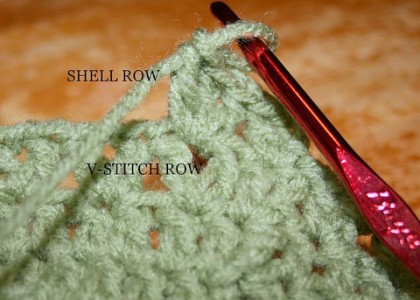
-(DC, CH1, DC) or V-stitch, in the 2nd DC of each Shell, Continue for the entire row, SS to the top of the CH 3 of the beginning stitch, SS, CH 3
-Place 3 DC (Shell) in the CH 1 space of the V-stitch below. Continue for the entire row, SS to the top of the CH 3 of the beginning stitch, SS, CH 3
-(DC, CH1, DC) or V-stitch, in the 2nd DC of each Shell, Continue for the entire row, SS to the top of the CH 3 of the beginning stitch, SS, CH 3
-Place 3 DC (Shell) in the CH 1 space of the V-stitch below. Continue for the entire row, SS to the top of the CH 3 of the beginning stitch, SS, CH 3
-(DC, CH1, DC) or V-stitch, in the 2nd DC of each Shell, Continue for the entire row, SS to the top of the CH 3 of the beginning stitch, SS, CH 3
-Place 3 DC (Shell) in the CH 1 space of the V-stitch below. Continue for the entire row, SS to the top of the CH 3 of the beginning stitch, SS, CH 3
-(DC, CH1, DC) or V-stitch, in the 2nd DC of each Shell, Continue for the entire row, SS to the top of the CH 3 of the beginning stitch, SS, CH 3
-Place 3 DC (Shell) in the CH 1 space of the V-stitch below. Continue for the entire row, SS to the top of the CH 3 of the beginning stitch, SS, CH 3
-(DC, CH1, DC) or V-stitch, in the 2nd DC of each Shell, Continue for the entire row, SS to the top of the CH 3 of the beginning stitch, SS, CH 3
-Place 3 DC (Shell) in the CH 1 space of the V-stitch below. Continue for the entire row, SS to the top of the CH 3 of the beginning stitch, SS, CH 3
-Fasten off
Button:
-CH 3
-HDC x 12 in the first CH, SS to first HDC
-Fasten off
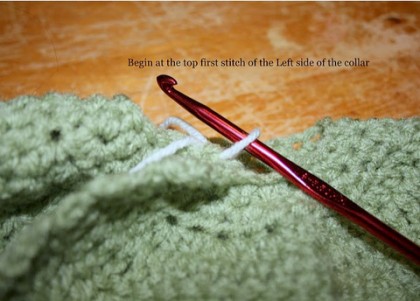
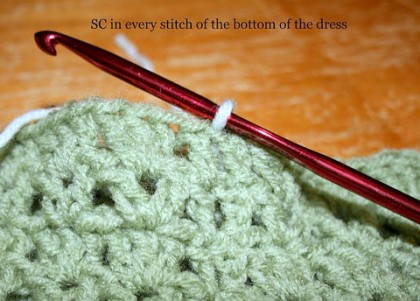
Now, use a contrasting or complimenting color of your choice (same yarn weight), and SC around the collar and dress bottom perimeter (as shown.)
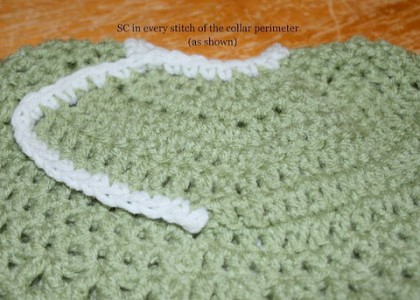
Do the same for the bottom of the dress.
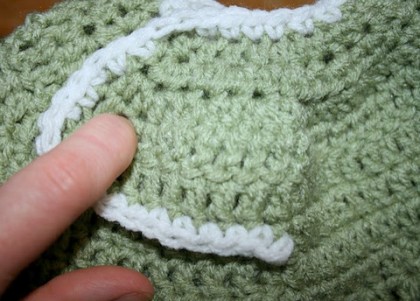
Find the spot, with your finger, where you want to place your button. The button will be pulled through the overlapping HDC.
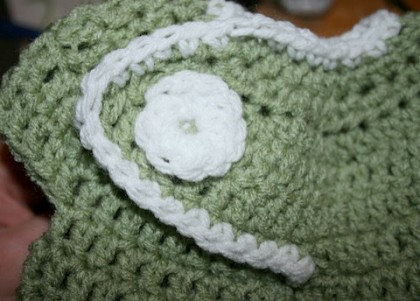
Secure the button.
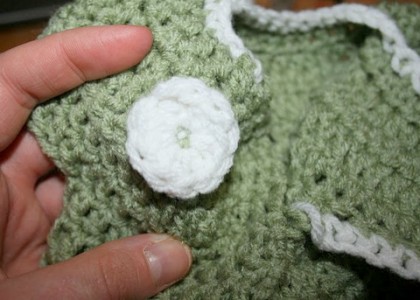
Pull the button through the HDC of the overlapping flap.


via http://rhythmofthehome.com/