Finishing the Edge of a Jacket with Crochet.
I want to suggest one of the many possible options for finishing the edge of a jacket. A neatly joined, dense fabric cut harmonizes the entire garment. Arrange all motifs in the fabric so that the edge of the piece is as even as possible.
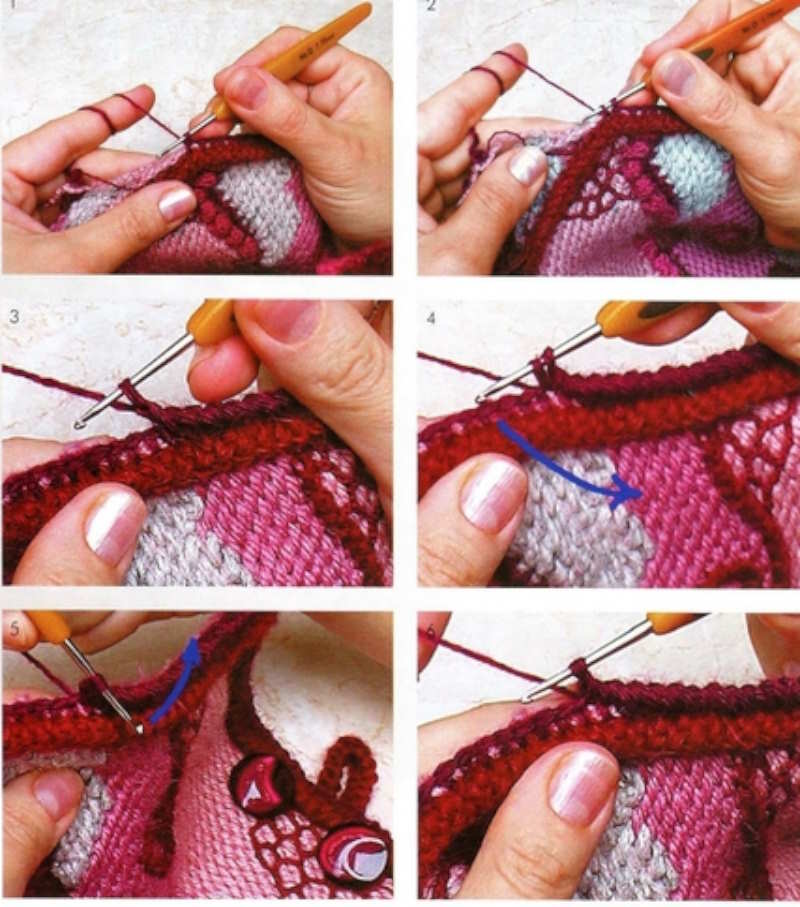
If, when joining motifs and scrumbles, bumps or indentations appear, fill them in with fabric made using “eyelash yarn,” “bouclé,” or Tunisian crochet.
- Photos 1 and 2.
Begin edging the jacket after joining the side and shoulder seams of the front pieces and the back.
Crochet a cord (“Roman cord” or similar) that matches the length of the edge of the piece. Do not cut the yarn. Later, the cord can be unraveled or extended if the edge length and cord length don’t match.
Place the cord along the edge and crochet one row of single crochet stitches, inserting the hook through the side loops of the cord and the edge of the crocheted fabric. At the same time, hide the yarn tails left from previous work.
This method helps to smooth out small irregularities along the edge, and the single crochet stitches will be even in size. - Photos 3, 4, and 5.
Over the row of single crochets, work a row of right-slanting reverse single crochet (crab stitch).
Unlike the traditional crab stitch, which is worked left to right, this variation is worked right to left.
There is one loop on the hook. Insert the hook under both top loops of the previous row’s stitch, yarn over, and pull up a loop. Rotate the hook counterclockwise (as shown by the blue arrow in the diagram). Two loops, twisted 360°, will form on the hook. Yarn over again and pull through both twisted loops. Continue in this way along the entire edge.