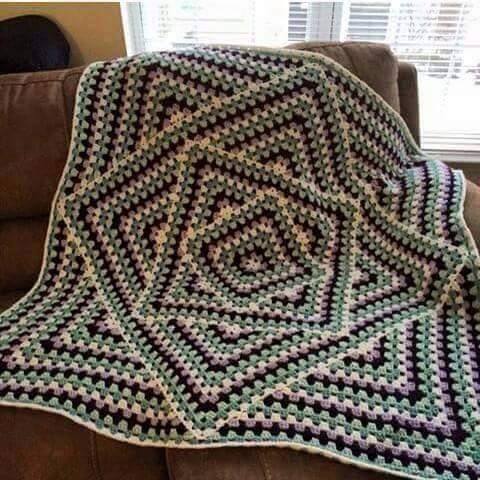
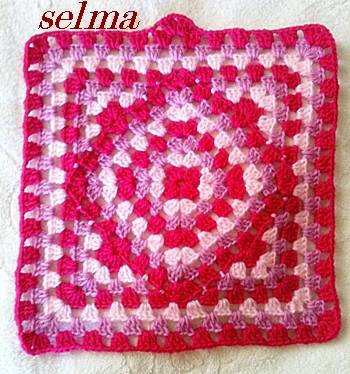
Interesting Granny square blanket!
Edit 17/02/2017: I have decided to work this out with a photo tutorial in more detail to help those that want to create this beautiful granny square! I will be as detailed as possible, enjoy!
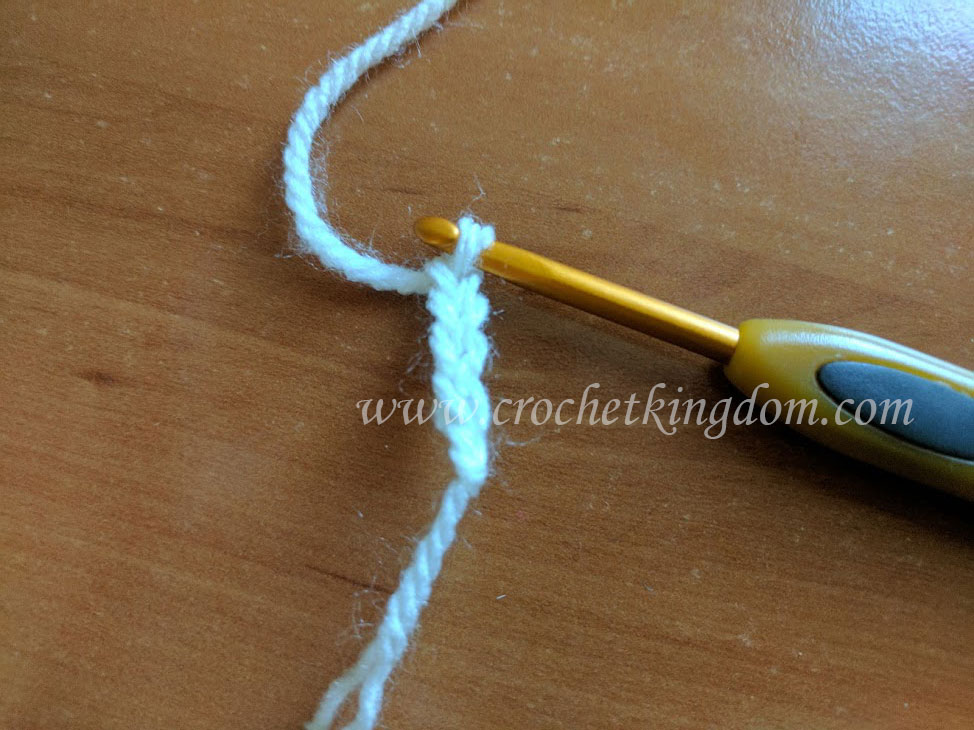
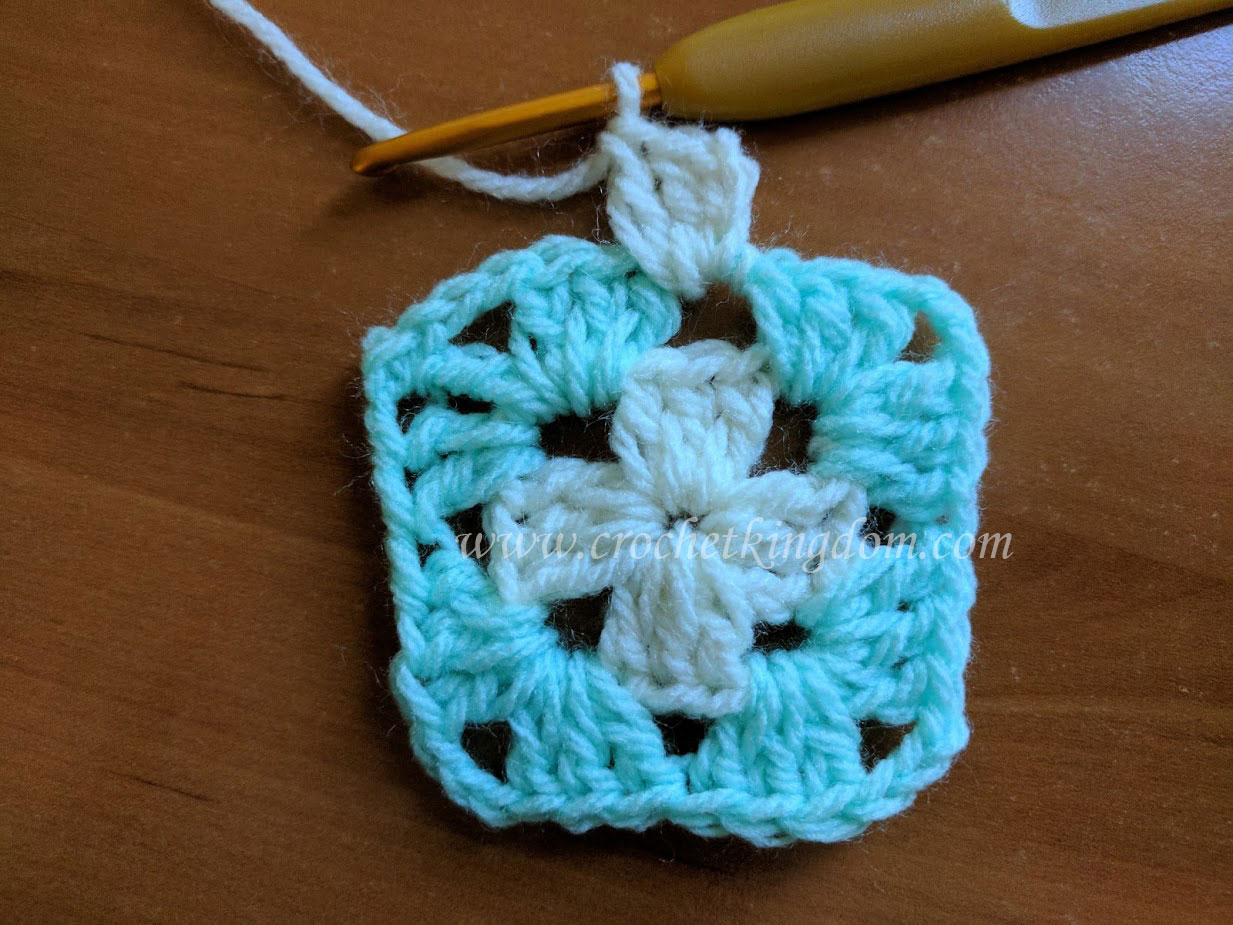
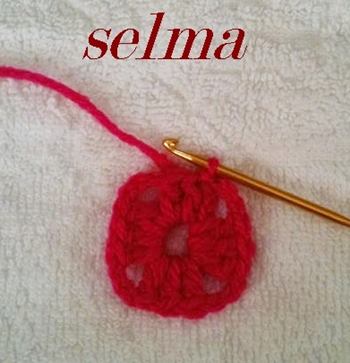
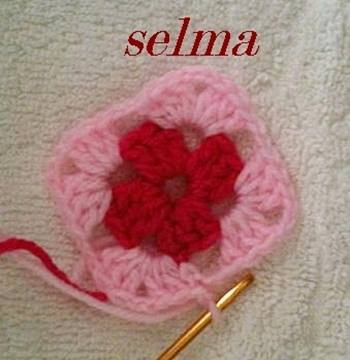
Begin with chain 4:
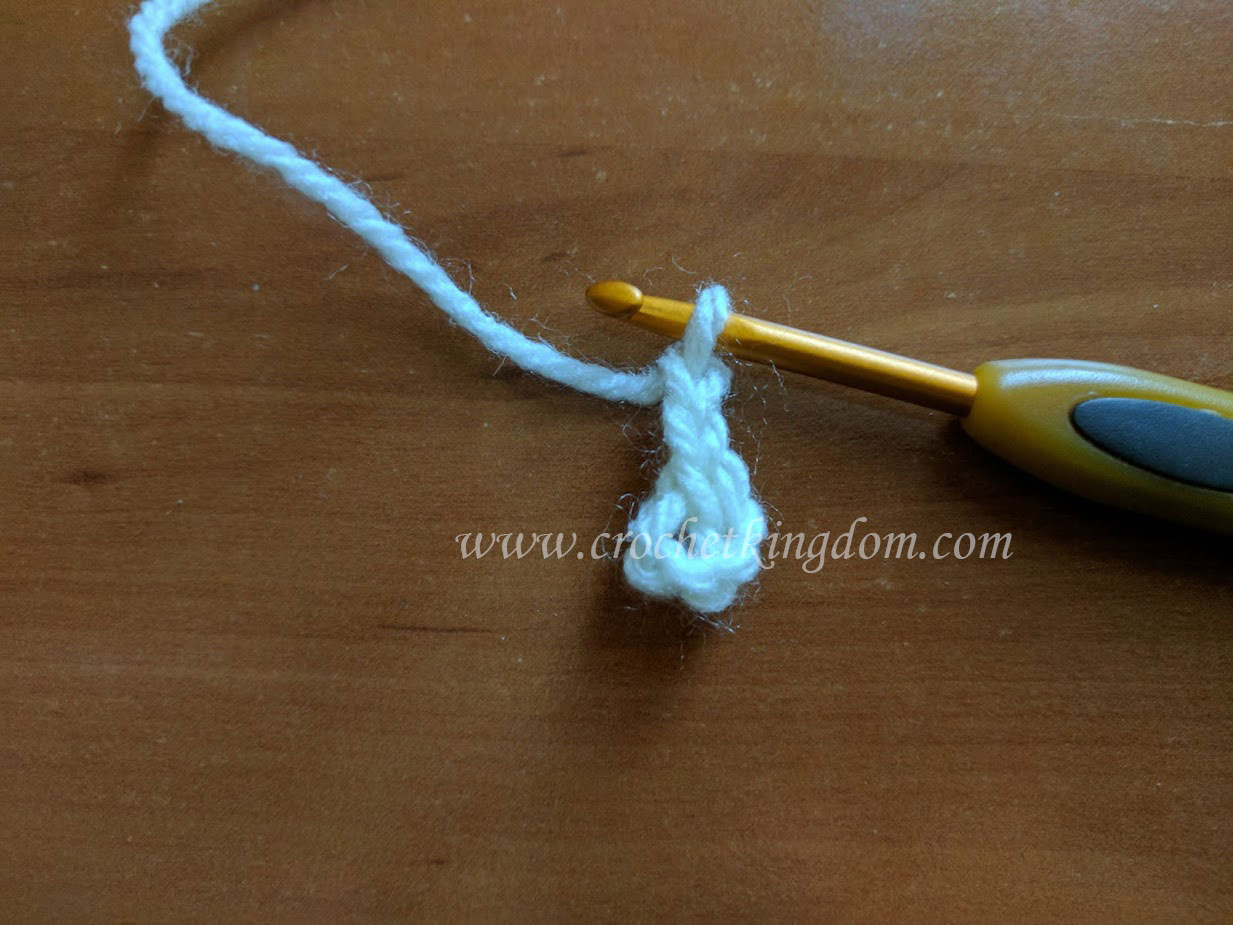
Close chain 4 and the chain 3 (counts as first dc {doublecrochet}):
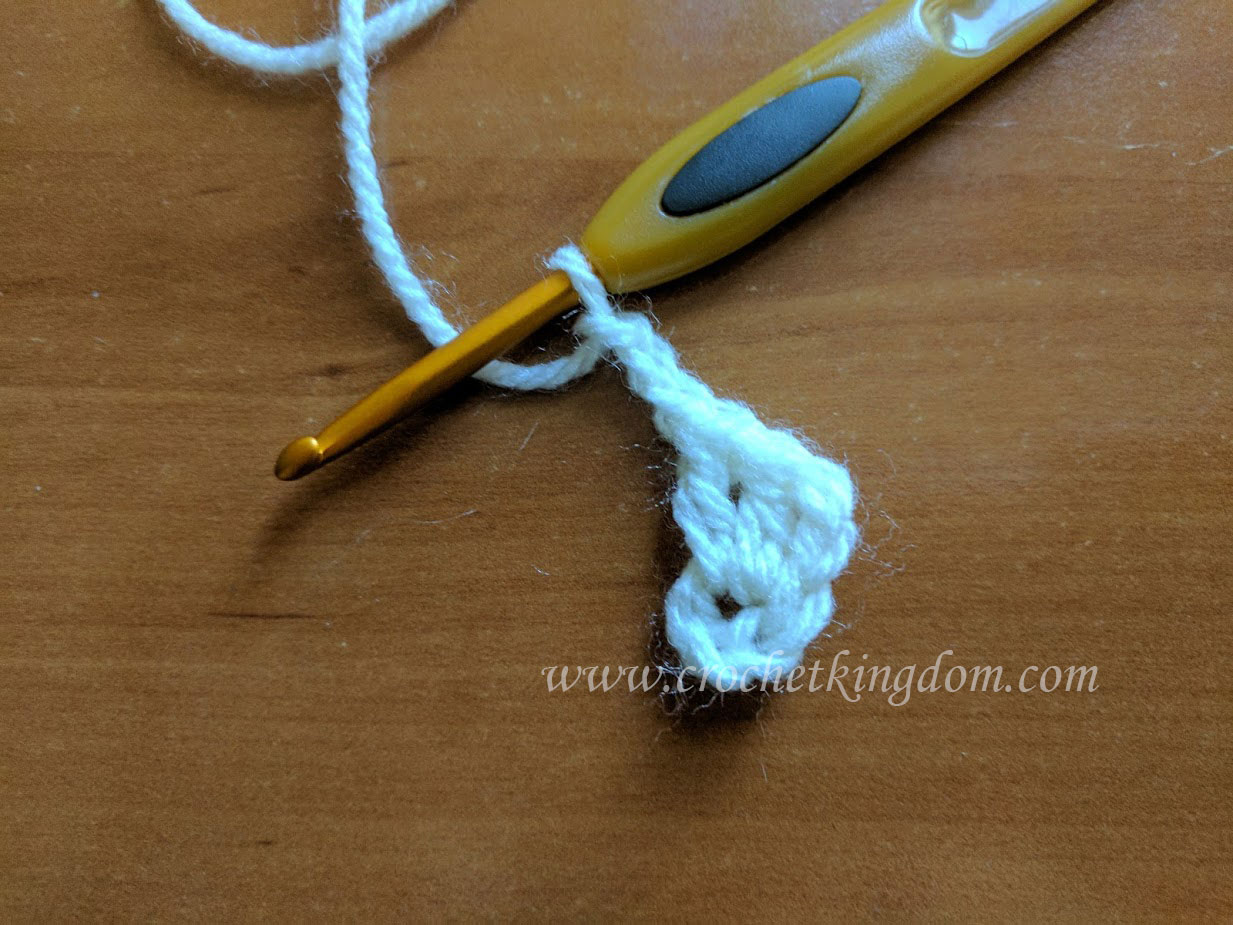
dc 2 more times then chain 3:
dc 3 times into the loop and then chain 3:
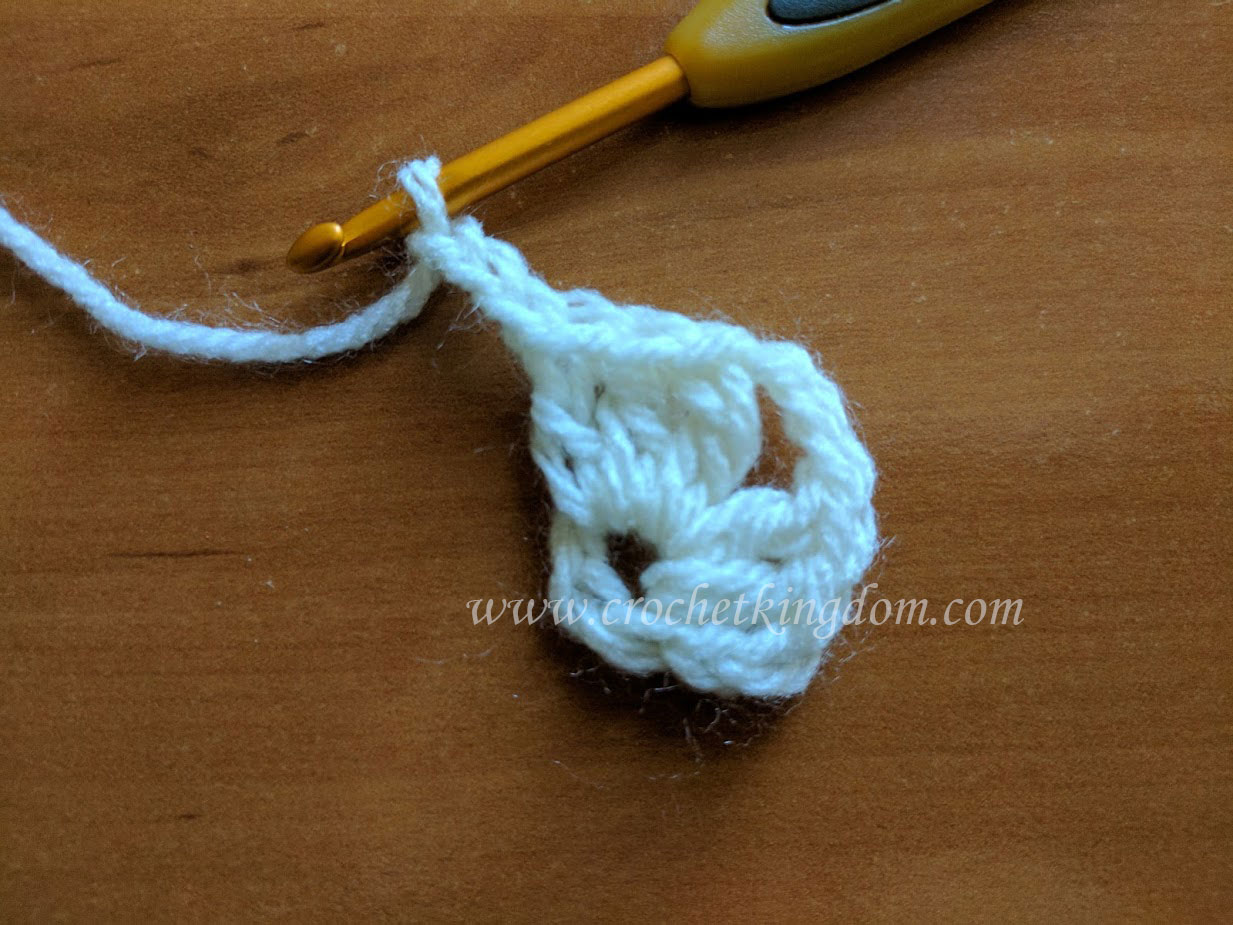
Continue in this pattern until you have 4 groups of 3 dc’s with a chain 3 in-between, then close the round with a slip stitch:
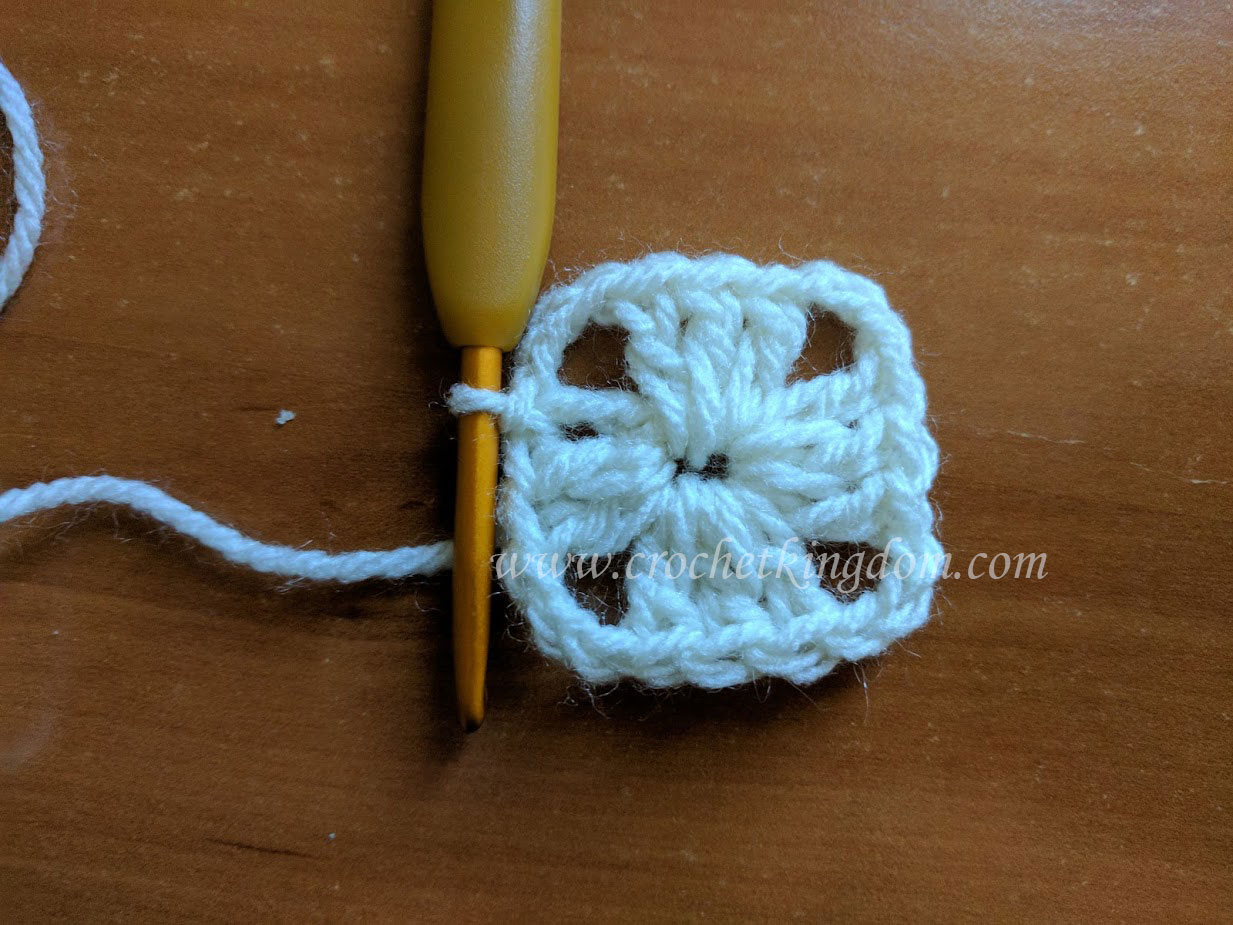
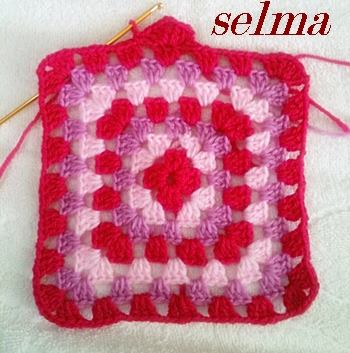
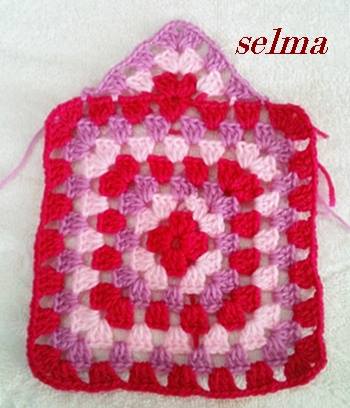
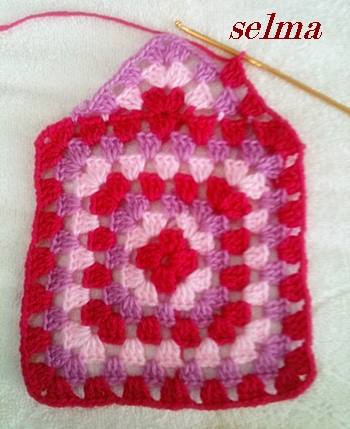
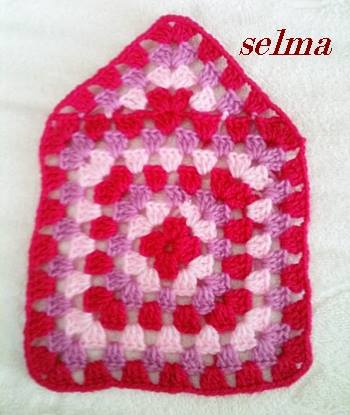
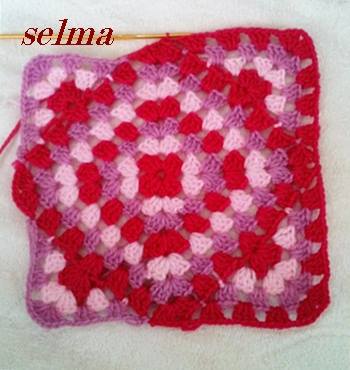
And now we have the first round complete, this is also the way you create a regular granny square.
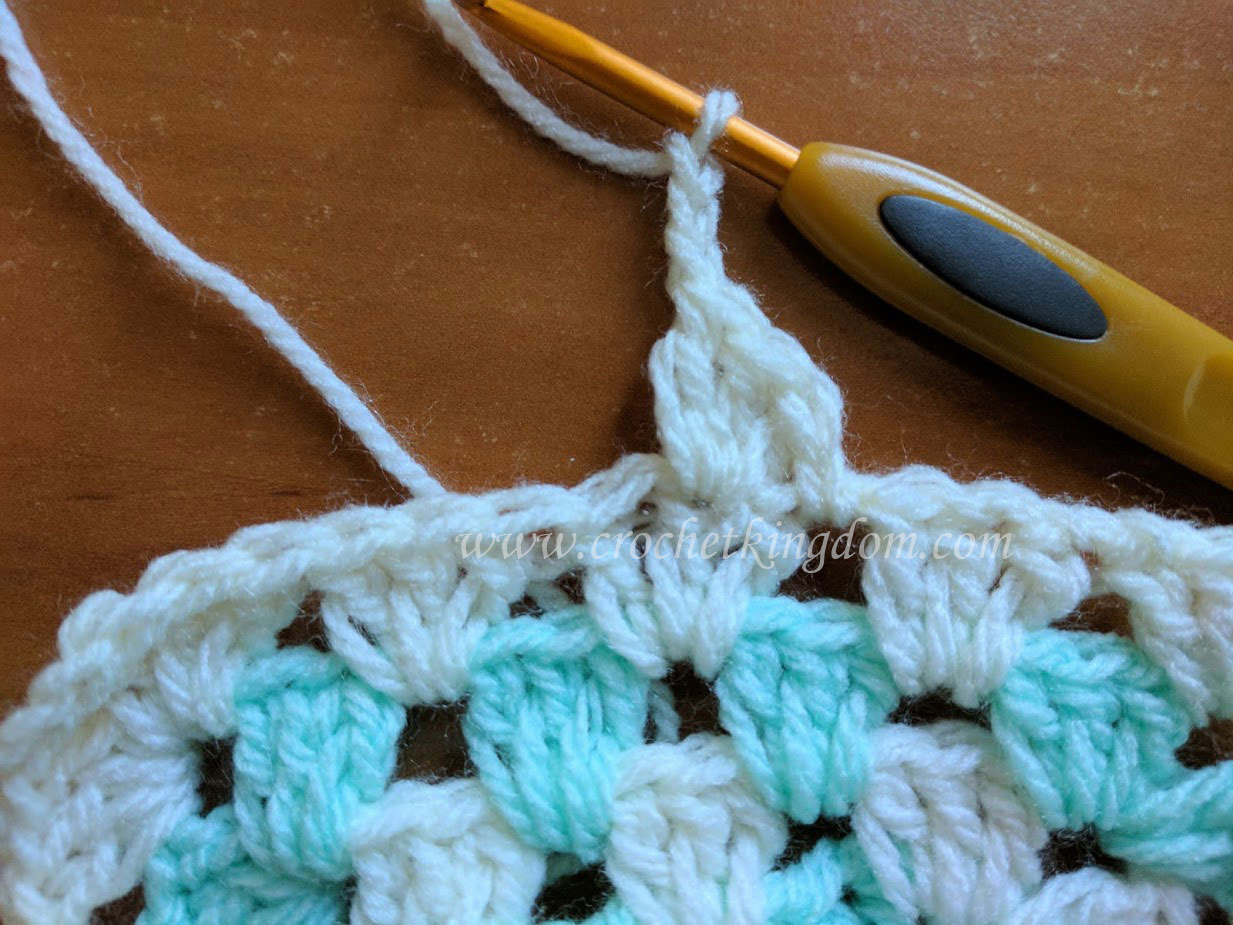
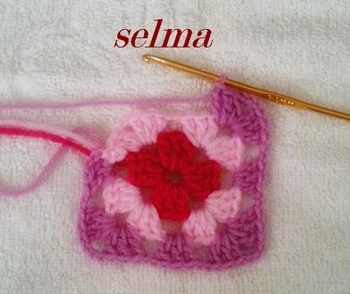
Next round, we can join in the color of your choosing and chain 3 (counts as first dc):
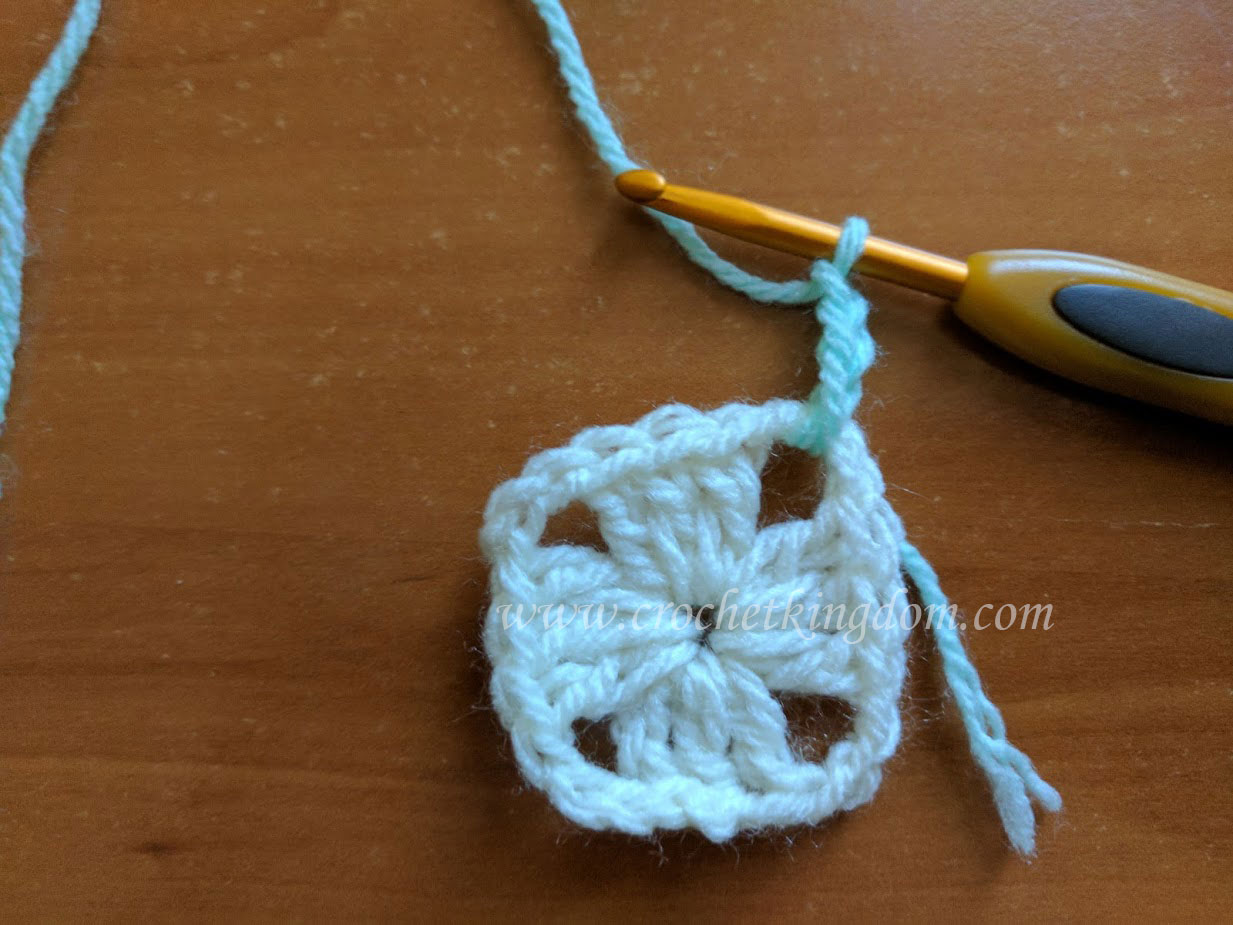
dc two more times into the same stitch as the chain 2 above, then with NO CHAINS between last dc and next dc you will create 3 dc’s into the next hole, followed by a chain 3 and 3 dc again (here we have our edge):

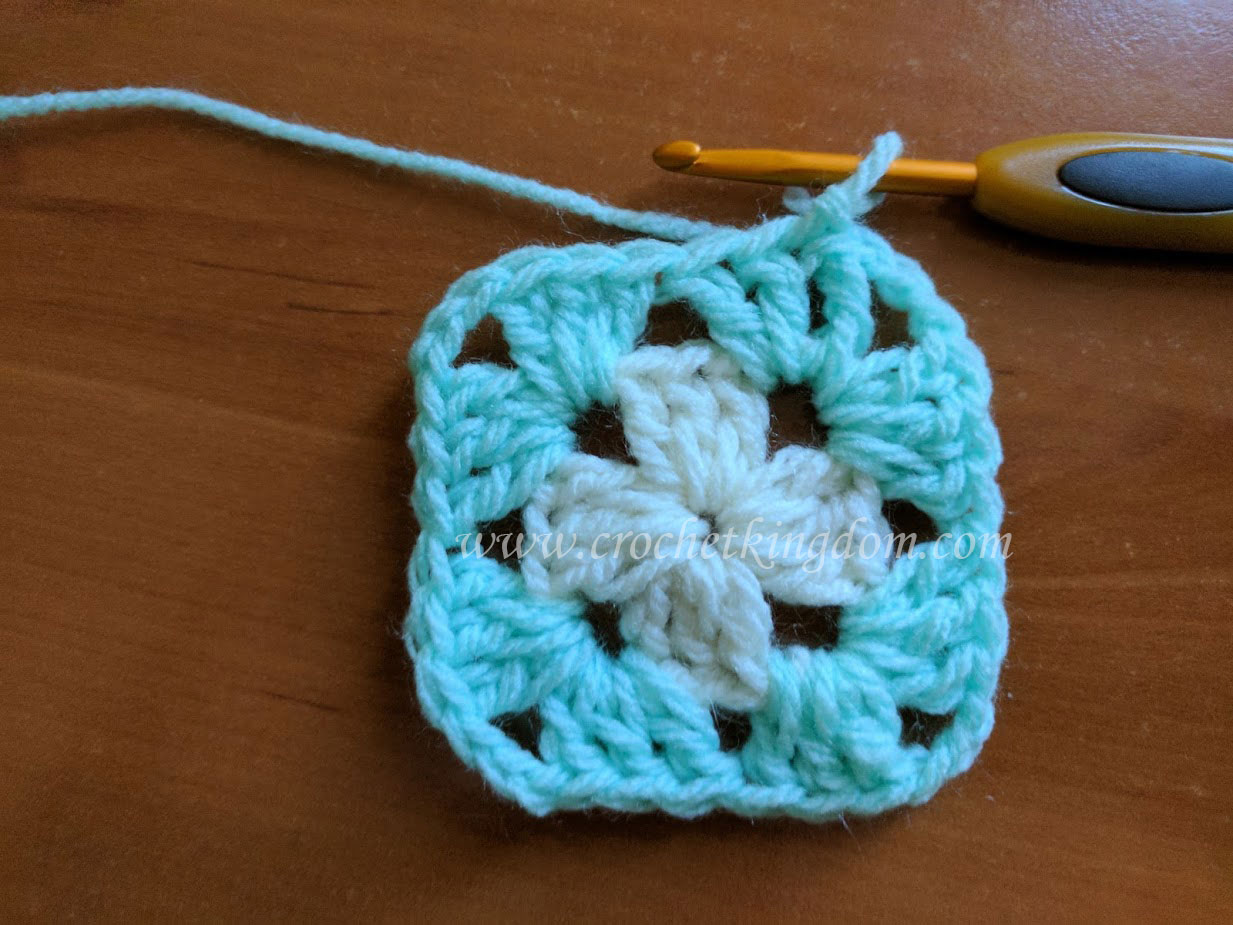
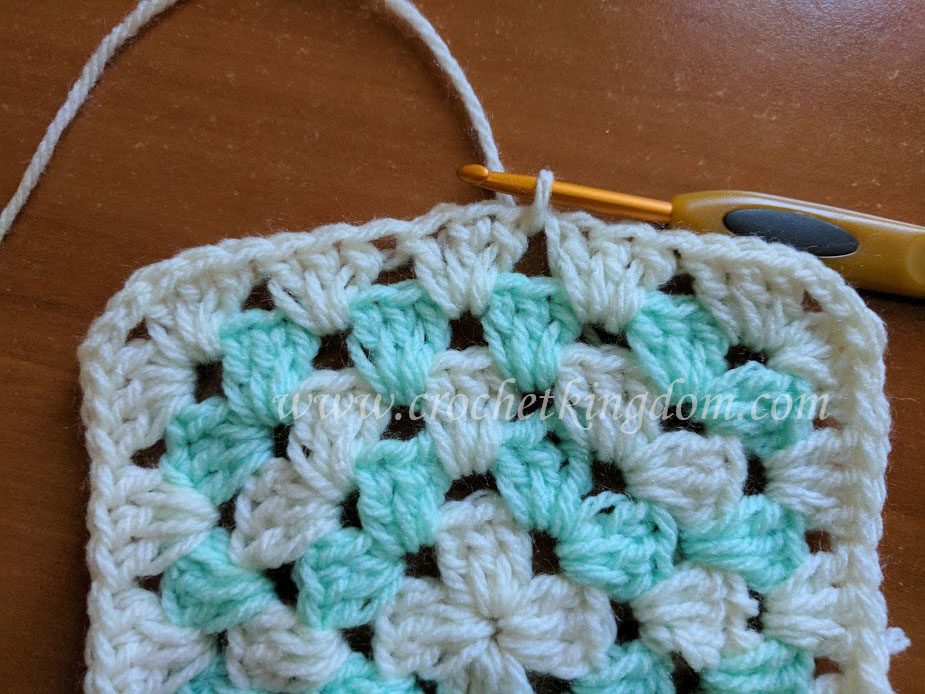
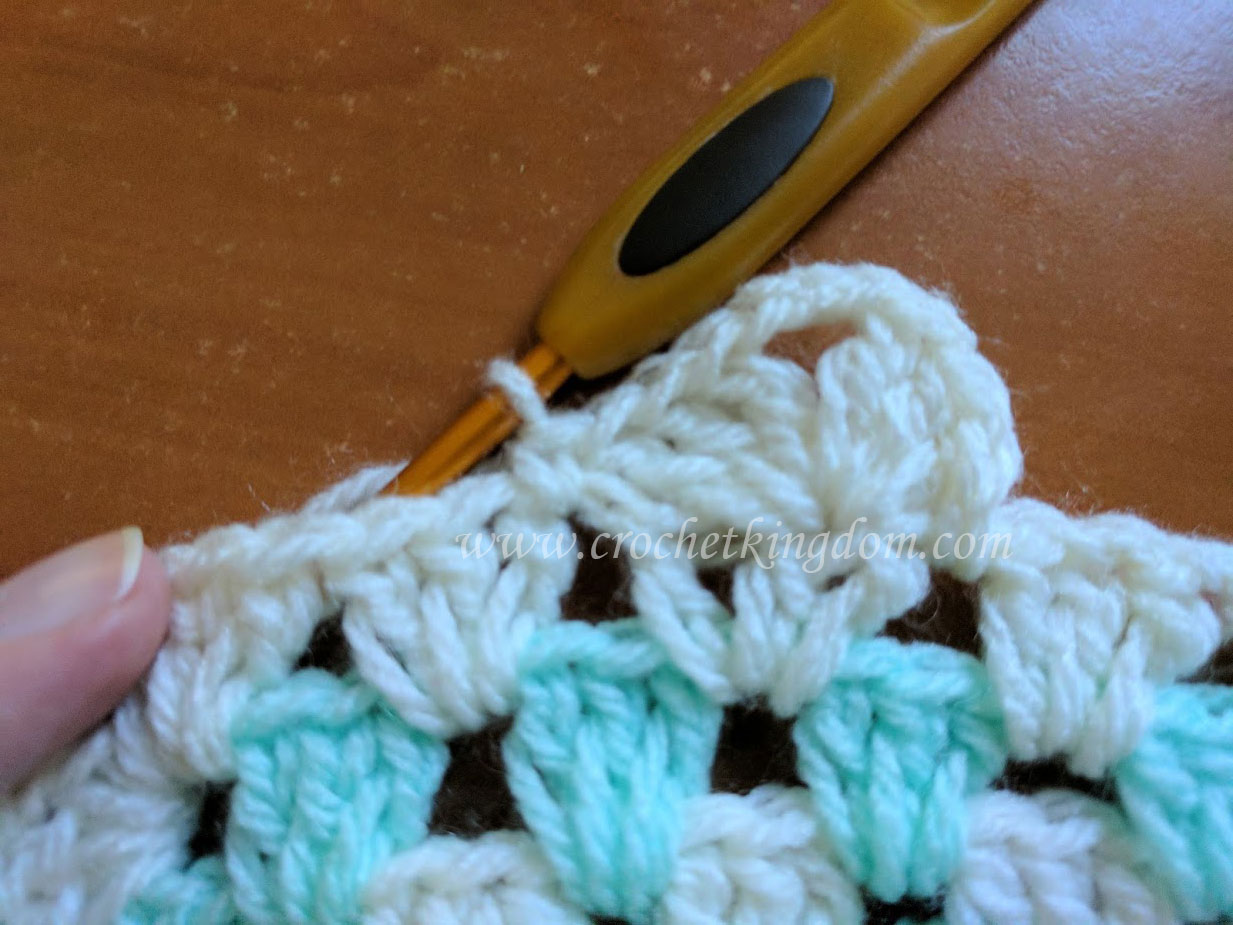
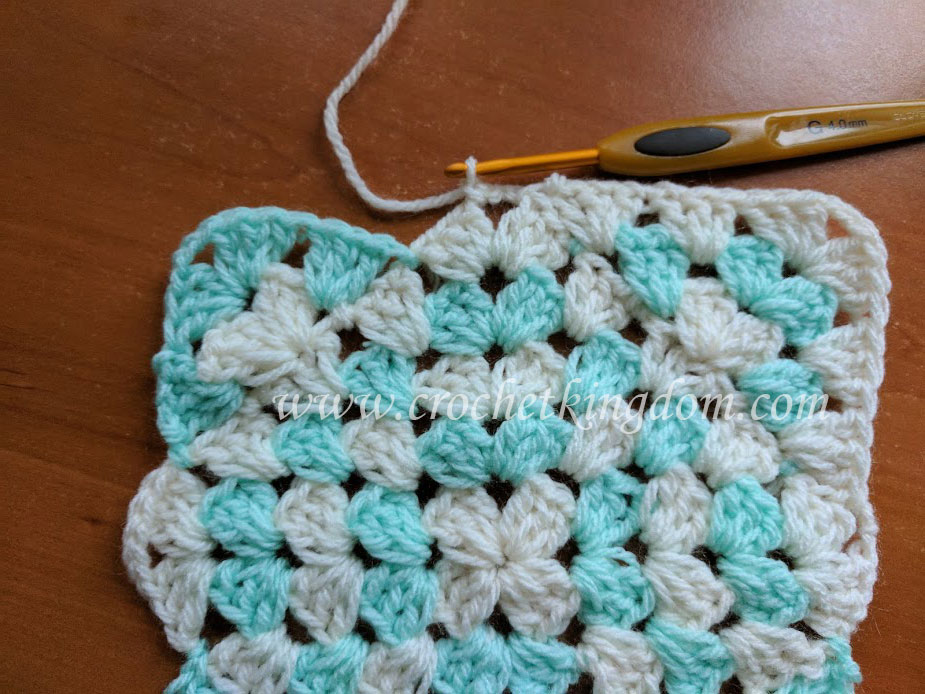
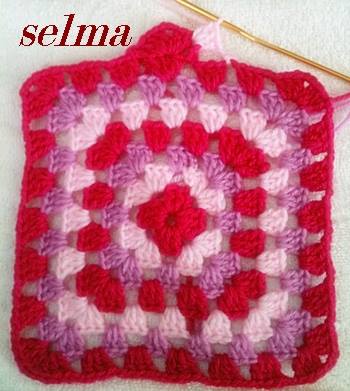
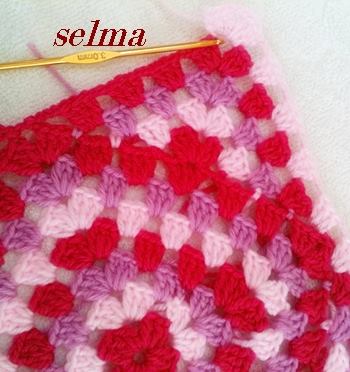
Continue until the round is complete as in the image below:
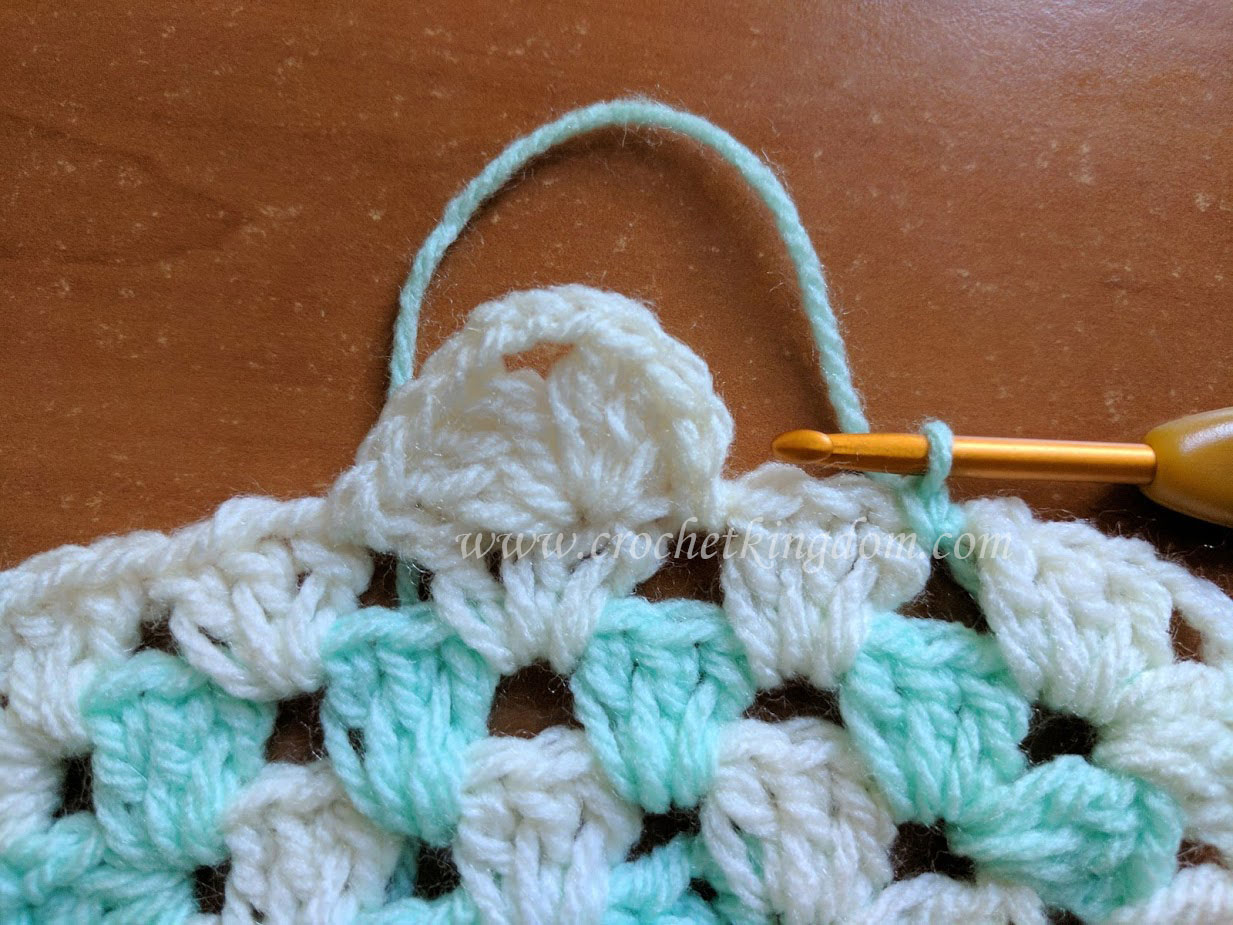
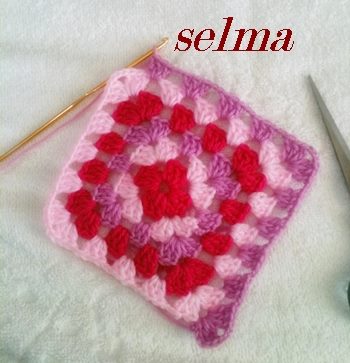
Start round three as shown below with a chain 3 (counts as dc) then 2 dc:
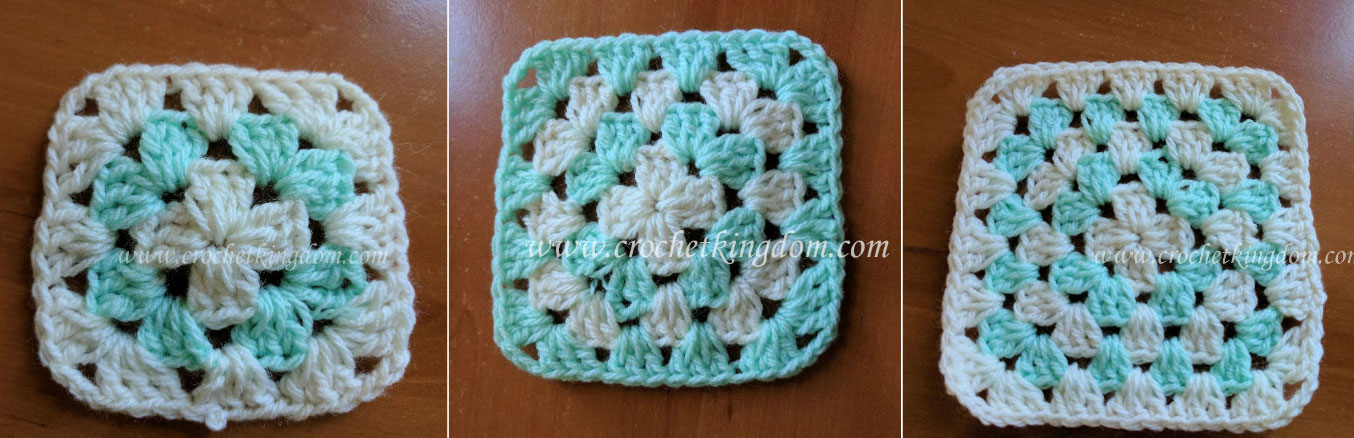
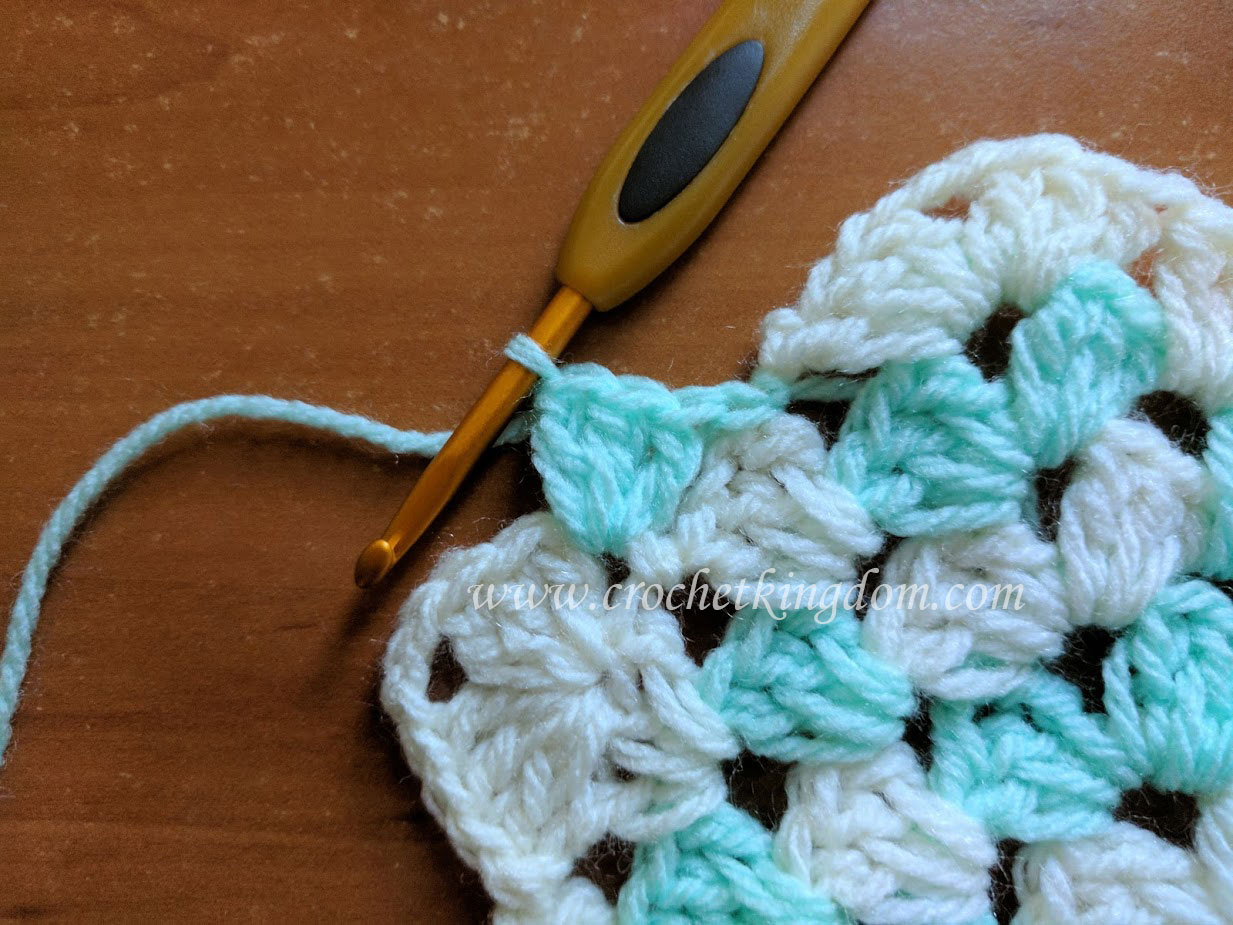
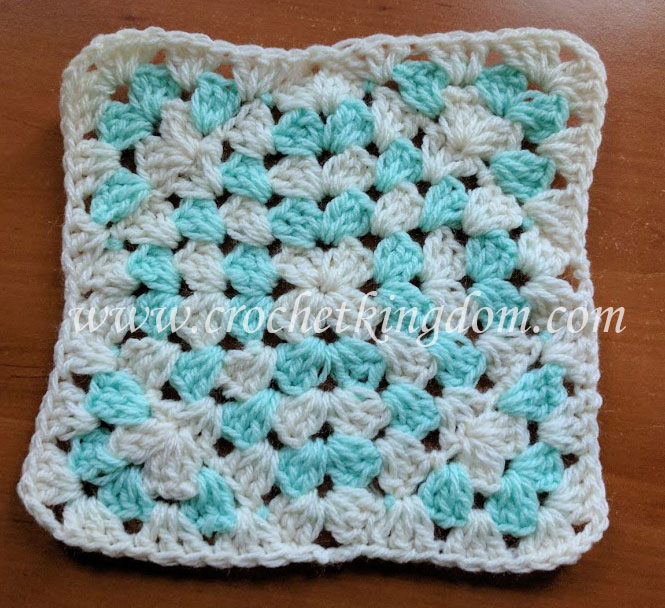
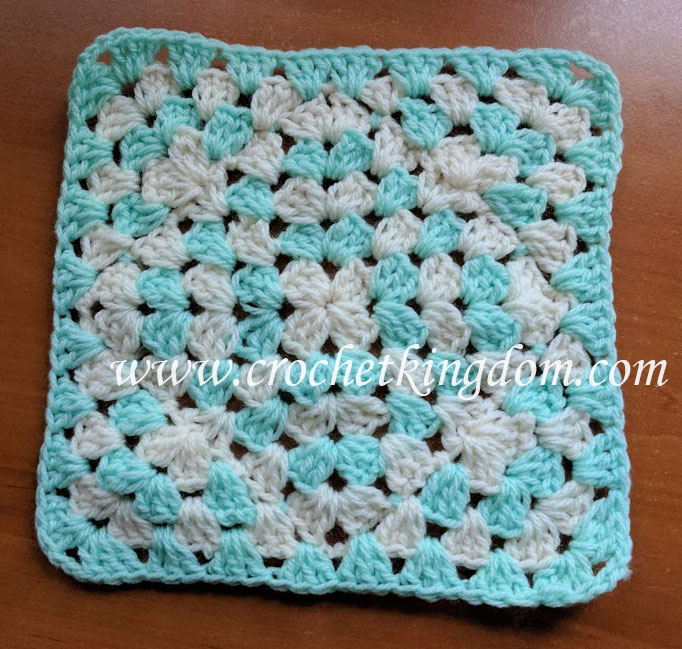
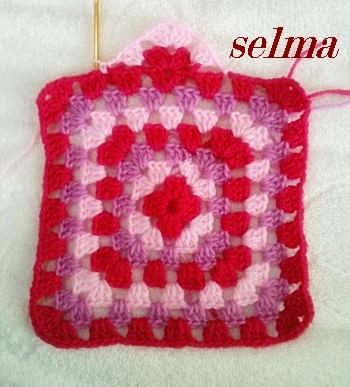
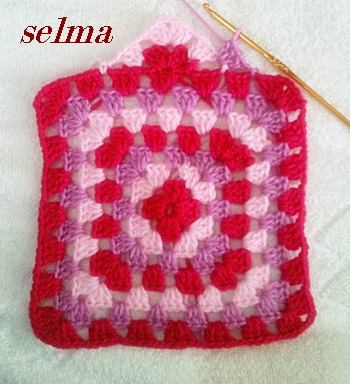
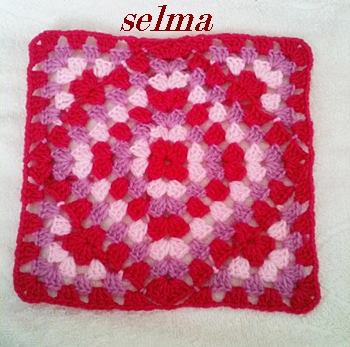
Continue to create the granny square as described above until it’s the size that you desire. Here are the following rounds:
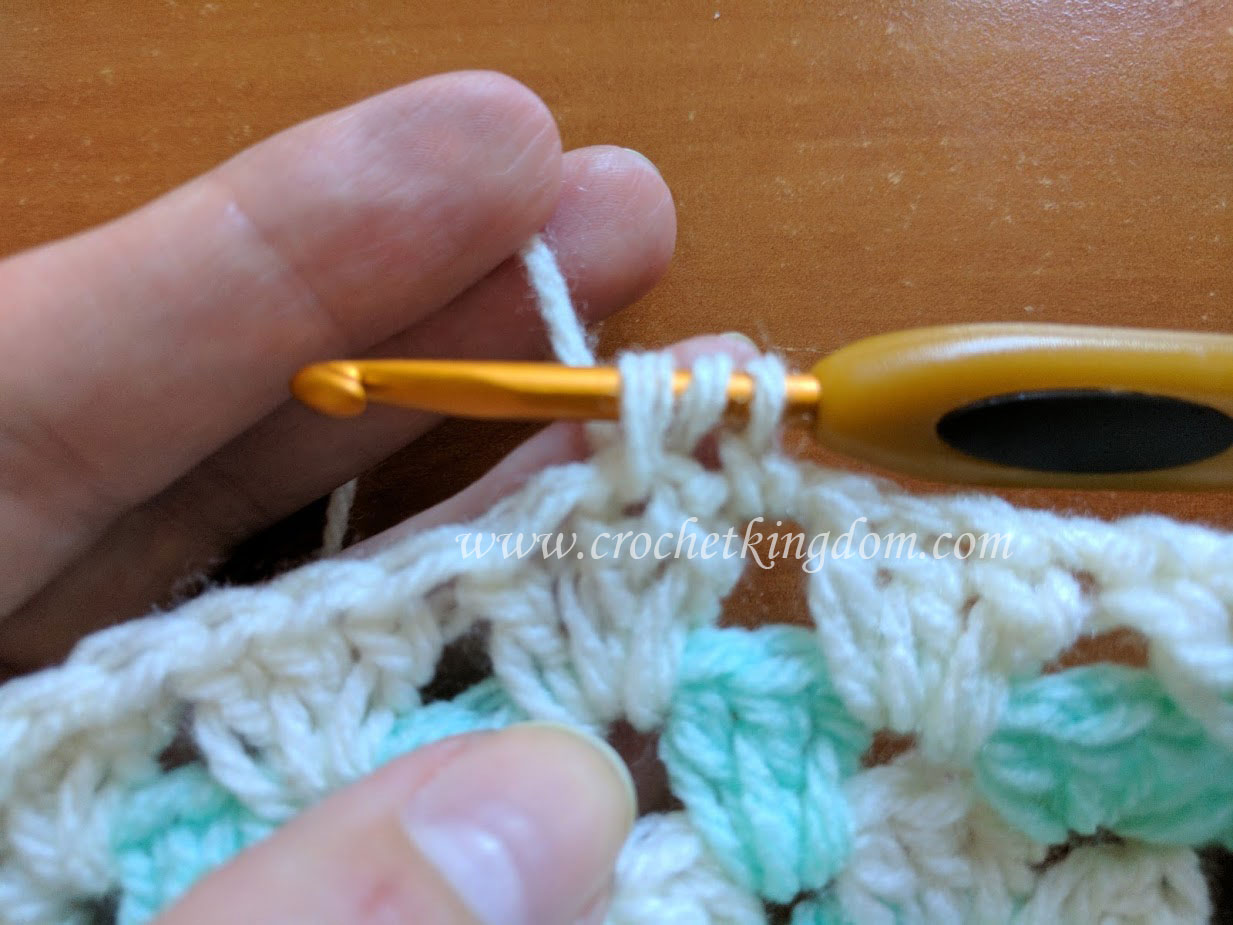
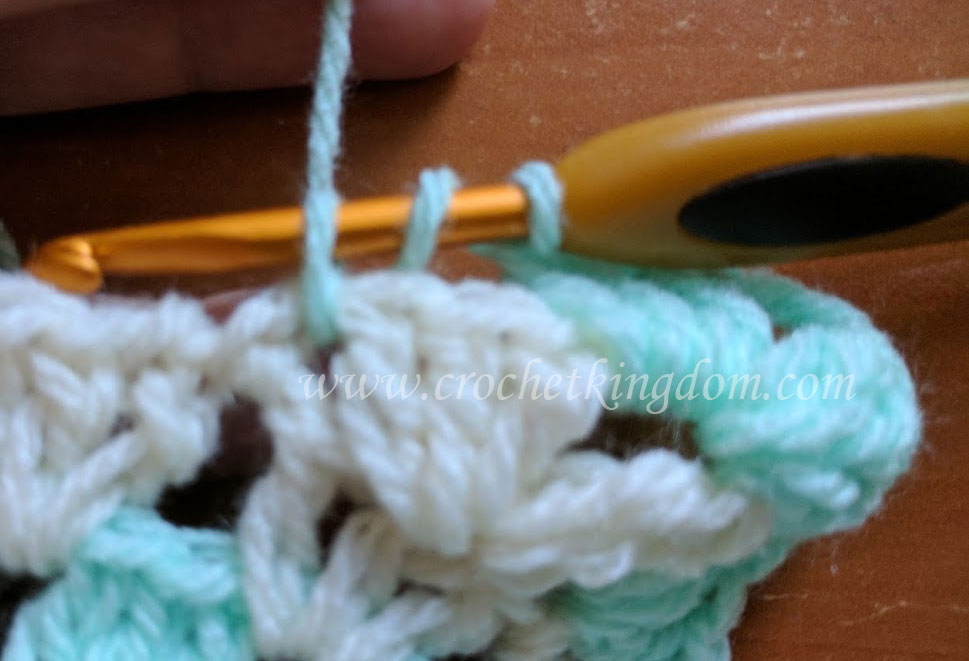
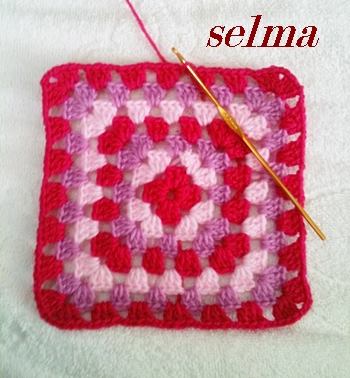
Now for the edge, find the middle 3dc group and slip stitch into the space just before it as in the picture:
I finished on an odd number of 3dc clusters in the previous round , hence I will have to work by inserting the crochet hook into the middle of the second dc in the 3 dc group, then dc:
2dc (creating total of 3), then chain 3:
3dc into the same opening:

Slip stitch onto the next space:
Start your next round with a slip stitch as shown in the picture below:
The we are going the 3dc into the section illustrated in the image below:
I will simply post the rest of the images as they are self explanatory, if confused ask for help in the comments section and I will try to be more detailed.
![]()
![]()
![]()
![]()
![]()
![]()
The following pictures explain the next round which is worked in the same manner as the previous round.
![]()
![]()
![]()
![]()
![]()
![]()
![]()
![]()
![]()
![]()
![]()
![]()
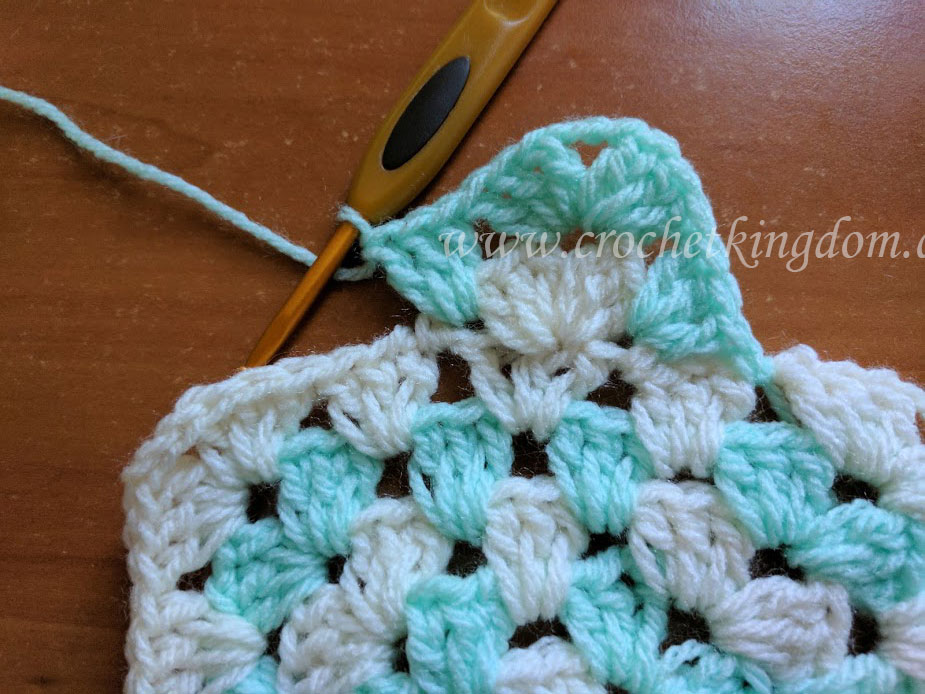
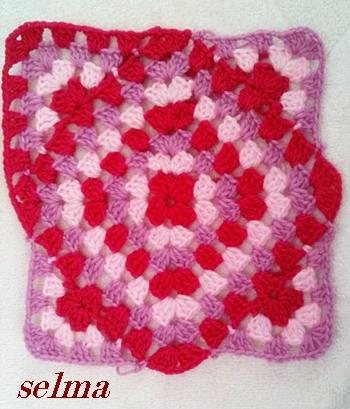
Now, let’s finish the next three corners without finishing the final round so it look like this:
![]()
![]()
We can complete the next three corners together, begin with a slip stitch as shown in the picture below:
The 3dc as shown:
![]()
![]()
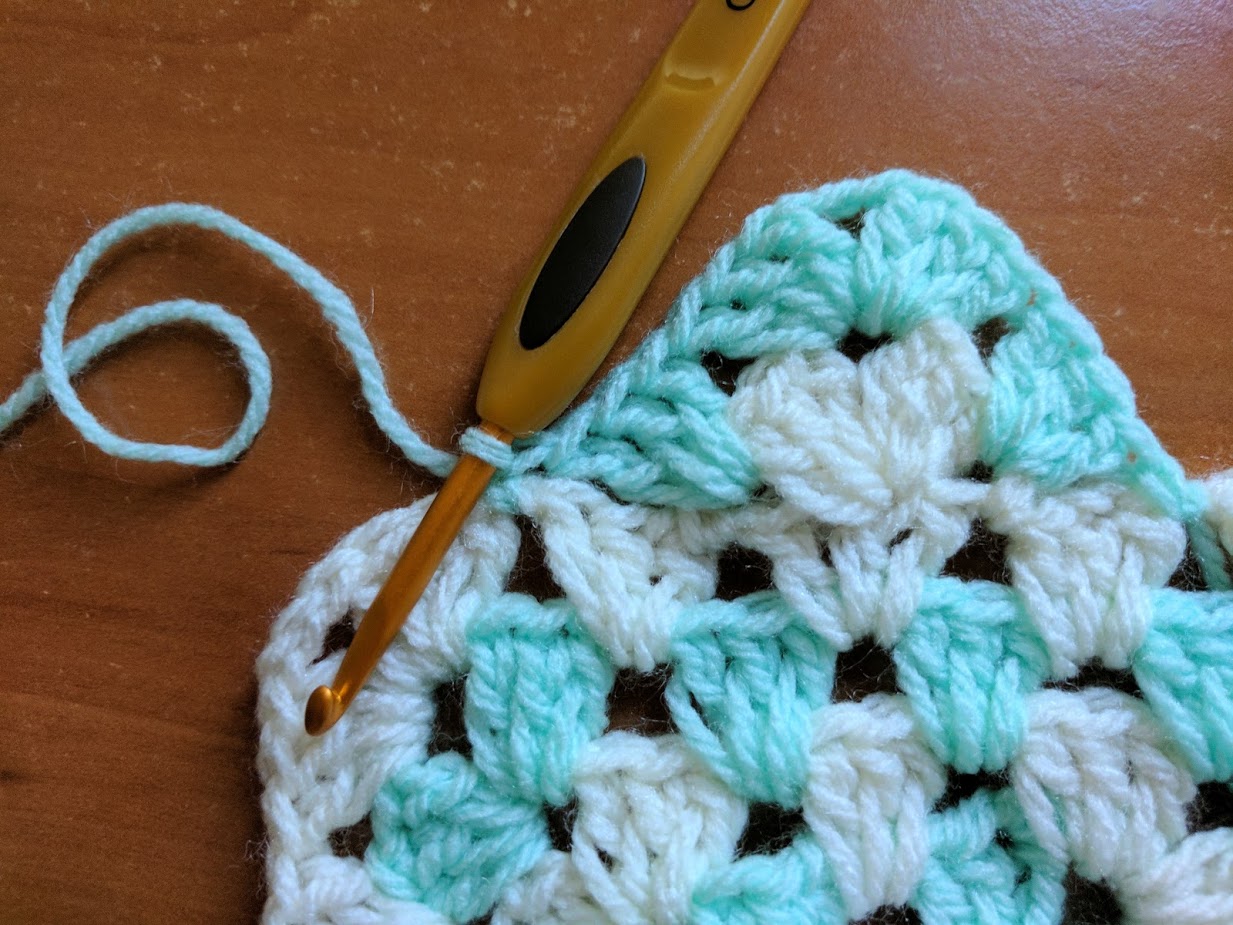
Continue until you have completed the round just slip stitch into the 3 chain edge of previous round and keep going:
![]()
![]()
Until you have this:
Now we can start a new round by chaining 2 in a corner (counts as first dc) as follows:
![]()
![]()
![]()
![]()
Complete the round:
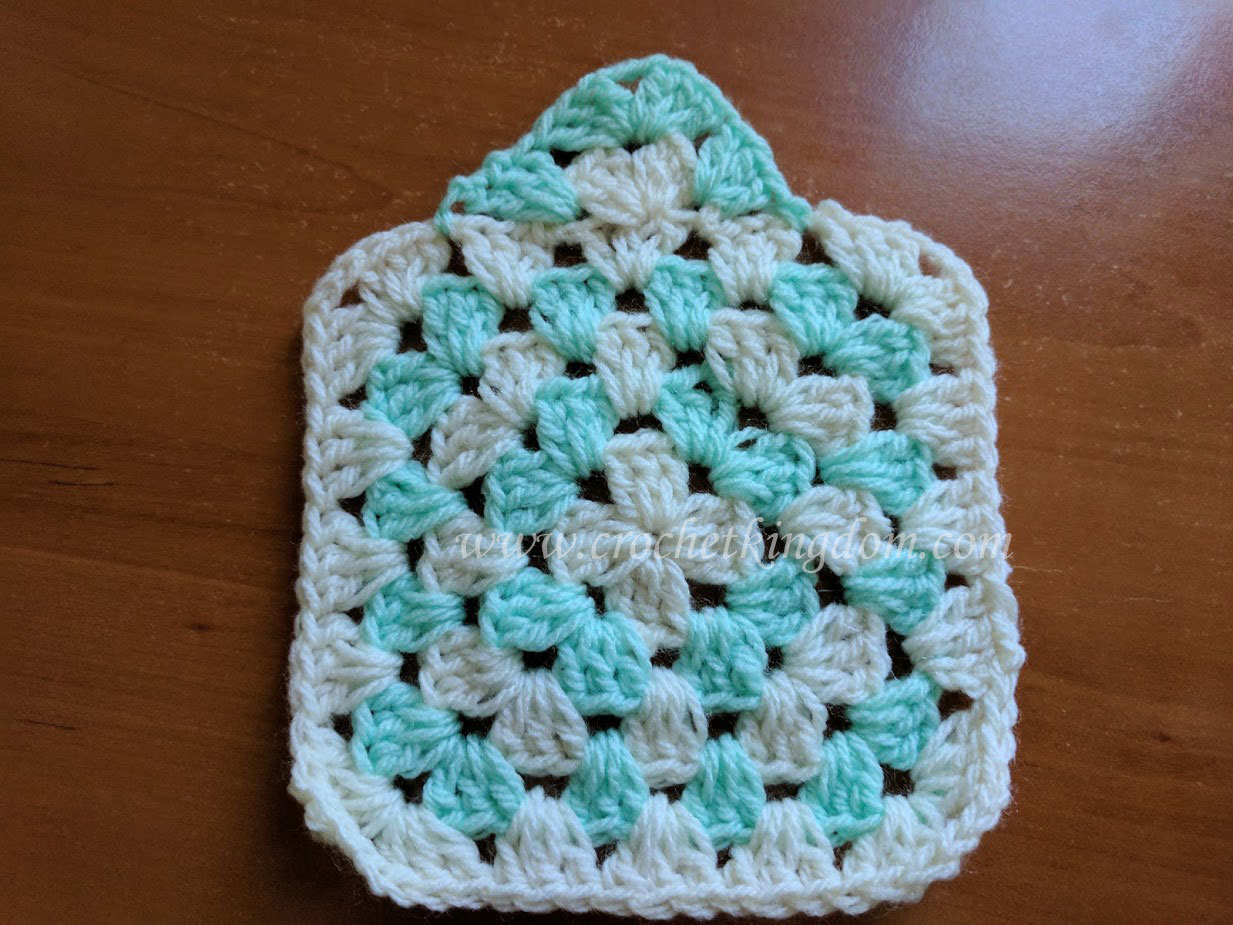
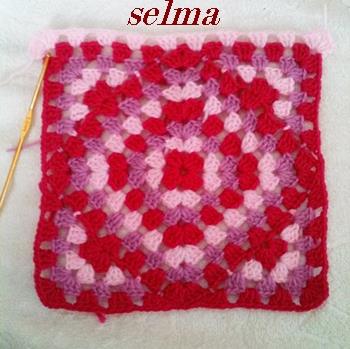
And you just keep going in this way, add as many more rounds as you like then start the new edges as described above and so on.
I could have used more yarn colors to make it easier to see the superimposed squares. Hope you are all now able to crochet this beautiful pattern!!!
Below are the original instructions that caused some confusion, I have kept them there for reference.
so can i get the written directions for this?? this is a BEAUTIFUL blanket
Hi, all I have is this picture tutorial, but it is just a work on the basic granny square and you can see how to create that here: http://www.crochetkingdom.com/crochet-inspiration/crochet-granny-square-inspiration/
Thank you for sharing. It’s a lovely idea.
how many skeins of each color did you use? what is the finished size of the one you have shown. and the size of hook you used? It is beautiful and I love the colors you used.
do you have written instructions for the interesting granny square blanket?
no
Thanks for sharing the tutorial. It’s such an interesting twist on the granny square. I can’t wait to start one!
How do you start the 1st triangle? I have the initial square done but am stuck as to how to start the next round.
I cant figure this out with the pictures, does anyone know how to start creating it beyond the first granny square,thanks
Please explain how you are to do the triangles after the first granny square is done. The picture really isn’t showing how it’s done.
Has anyone figured this out. I can do the granny square but cant figure out the rest. Thanks
From what I can see…. after first granny square,
1ST COLOUR…. 1dc in 3rd space between treble clusters from corner, 3tr in 1st space of next 3tr group, 3ch, 3tr in 2nd space of 3tr group, 1dc in next space between treble clusters, end that colour by pulling thread through.
2ND COLOUR…. 1dc in 2nd space between treble clusters from corner, 3tr in space between dc & 1st tr in previous colour, 3tr 3ch 3tr in 3ch space, 3tr in space between dc & previous granny square.
It is really hard to describe, you should then continue doing the same from there….. I am about to try it and will let you know if it works as I’ve written it.
do you have written pattern for the interesting granny square? I love it
I would also like the instructions for this blanket.Thanks.
I want to make this, where can I find the pattern?
Thank you for the inspiration, this is gorgeous. I started this earlier, almost finished the first square and came for a closer look re. where to start the first triangle. I have worked it out (I think!) but as far as I can see the smaller close-up square isn’t worked the same as the middle square in the main picture. I am about to ignore the small pictures and carry on how I think the big one is made. I’ll report back how I get on!
As I thought, the smaller pictures show an overview/example of how the bigger blanket is worked. Beautiful pattern, so easy and so very effective it will be finished in no time. Thank you so much for sharing this.
i love how you have shown in picture form the development of the afghan squares… could you give us the exact instructions?
thank you
where do I find the written instructions for the interesting square granny square I would like to have this . thank you ksueh@hotmail.com
I would like the written instructions for this granny square where can I find them Kathy herring ksueh@hotmail.com
From what I can figure out is to start the triangle you slip stitch in the chain one space. Then chain one do 3 dc in the middle dc ch 2 3 dc in same space ch 1 sc in ch 1 space. I hope that helps some of you.
Absolutely adoable – love the creative use of granny square
thanks for the tutorial
Do you have a pattern for this afghan?
That’s an awesome idea. Simple enough and effective. Thanks.
Has anyone figured out how many skeins (yards may be a better gauge) are needed of each color?
If you want to be safe, go with 4 of each color.
Everybodies tension for their stitches.
Brilliant pattern take on the granny square. Thank you Ruth
So for anyone still stuck on how to start the triangle part of the patter, the picture that starts it means that is where you slipstitch the start of the triangle. to create the first part, you 3dc in the middle of the foundation 3dc row (see picture above to clarify, ch 2 then 3dc in the same stitch and then slipstitch the next foundation chain, i can probably post pictures if anyone os confused
Just finished making this blanket. I had so many compliments on it. Glad I found your design
do you know approximately how much yarn you used of each color? I would like to attempt one of these myself.
Thank you for the update! I’ve just finished the centre granny square and added the triangles – when I did that row to do the 3 triangles into a square (slip st into chain 3 – continue dbl crochet etc) it’s puckered up. Did you do 2 slip st?
yes it does pucker, but as the square grown it smooths out, at least that is what I found.
How many sections do you have to do before it stops puckering? I was on the forth repeat section and the puckering keeps getting worse.
mine keeps puckering too!
I think that with just one chain at the beginning of each row it is impossible!
Some people crochet more loosely than others, I just tried working it out from the main image. Did it still pucker after more rows. Mine did not look that way.
Let us know how you went, my reason for creating this crochet blog is so that we can all help each other out with all the interesting free patterns on the web, especially those in other languages. If you discover a better way then that is great! Thanks for your input!!
I am a self taught crocheter, the Granny Square was the hardest for me to learn. Do not know why, as it is the easiest to do! 6 years later and I am obsessed with Grannies. I jumped for joy when I came across this tutorial..love love love it. Thank you so much for the pictures–both sets. I have a feeling this is one I am going to make a lot of. Thank you again. Btw, for those of you who can not see the previous replies because you didn’t read them or whatever, there is not a written pattern for this. It is picture tutorial. The pictures are super easy to follow. Read the instructions that follow each picture and you can have this whipped up in now time.
Thank you so much, love this!
Thanks for the picture and instruction update. I keep on having trouble when I start the v part or triangle part of the pattern, my first slip stitch on the 2nd to 5th rows always wants to fall out and then I have to start it all over again. How can I make sure that the slip stitch doesn’t fall out? I guess if I leave enough of a tail then I can anchor it in with the 3 double crochet.
Absolutely gorgeous.I have done a lot of grannies but this one is simply outstanding.thank you for sharing
I tried searching a tutorial I found on YouTube and after doing the first three 3dc sections, he turned it to continue the 2nd row. Does it need to be turned? I don’t see where that is mentioned in the instructions. I hope I described it correctly.
Is there a way to do this without having to cut and start a new color? I don’t want it to be striped, just solid colors
What size of hook was used ? G, H or I?
Do you think it would look alright with a variegated yarn and not changing colors?
So for each row on the triangles I have to cut and rejoin? I don’t turn? Yes the pictures are easy to follow but if I want to make the triangles in one colour I can see a lot of threads needing sewing in ….